Get inspired for your next home improvement projects by browsing through our blog posts, which are full of great tips, valuable advice, and industry insights.

Blog
Last reviewed: Aug 16, 2026
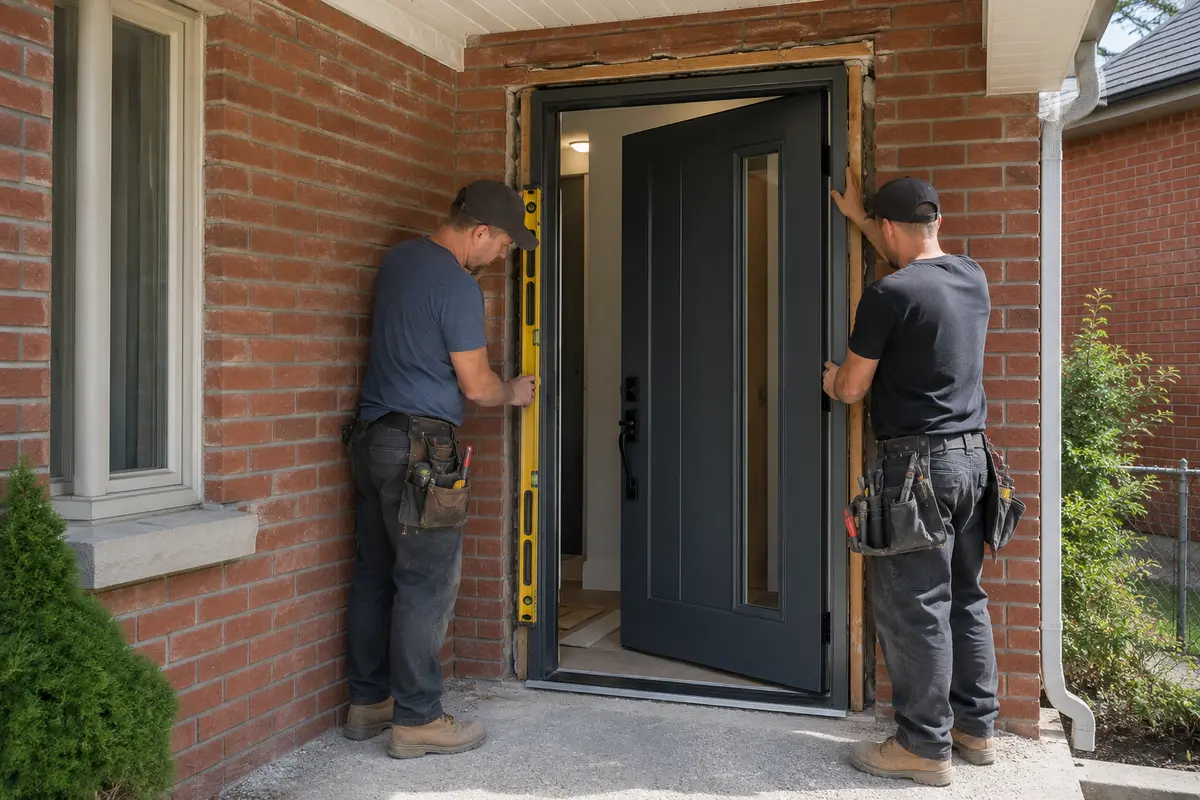
Replacing a front door involves much more than removing the old slab and attaching a new one. A properly installed exterior door is a complete system: the slab, frame, hinges, threshold, weatherstripping, glass and locking hardware must all fit and operate together. The frame also has to connect securely to the house while preventing unwanted air and water from entering around the opening.
During a professional entry door installation in Toronto, the crew normally protects the work area, removes the existing door system, inspects and prepares the rough opening, sets the new prehung unit, levels and squares the frame, anchors it securely, insulates and weather-seals the perimeter, installs the hardware and trim, and tests the finished entrance before cleanup.
This guide explains what happens before and during installation day, how to prepare your home, how long the work may take, what installers look for behind the old frame, and what you should inspect before the crew leaves.
If you are still selecting a door, begin with Imperial’s collection of entry doors in Toronto or read our complete Entry Door Replacement Toronto guide. If your new door has already been ordered, the steps below will help you understand the installation process from start to finish.
Most residential entry door replacement projects move through five broad stages:
Many standard single-door replacements can be completed within one working day. Double doors, sidelights, transoms, damaged openings, custom exterior finishes and structural changes may require additional time.
A successful installation begins with the correct product and accurate information. The door must be manufactured for the actual opening, wall depth, swing and hardware requirements of the home. Small errors at this stage can create significant problems on installation day.
During the consultation, the estimator should inspect the existing entrance and ask what you want to improve. Homeowners commonly want better security, fewer drafts, smoother operation, more privacy, additional natural light, a modern appearance or a more durable exterior finish.
You will normally review:
If you are deciding between the two most common materials, our fiberglass vs. steel entry doors guide explains their differences in durability, appearance, maintenance, security and cost.
You can also explore Imperial’s available fiberglass entry doors and steel entry doors.
Entry doors are often ordered as complete prehung systems made for the specific opening. Before manufacturing begins, a measurement technician or installer should verify the actual job conditions rather than relying only on an early estimate.
The final measurement may confirm:
The active door and swing direction must be clearly confirmed, especially for double doors or entrances where furniture, closets, stairs, railings or interior walls limit movement.
This is also the time to identify unusually wide doors, tall systems, attached storm doors, security bars or other features that could affect installation.
Once the measurements and selections are approved, the complete door system is manufactured. Lead time depends on the manufacturer, season, material, finish, glass, sidelights, transoms, hardware preparation and overall complexity.
Before installation is scheduled, ask:
The written agreement should identify the major product and installation details so both the homeowner and crew know what is included before the old door is removed.
Preparing the entrance allows installers to work safely and helps protect your belongings. Unlike window replacement, an entry-door project affects the main pathway into and out of the home, so both interior and exterior access must remain clear.
Before the crew arrives:
A professional crew should still protect the active work area and main pathway. Homeowner preparation gives the installers unobstructed access and reduces the chance that personal property will be damaged.
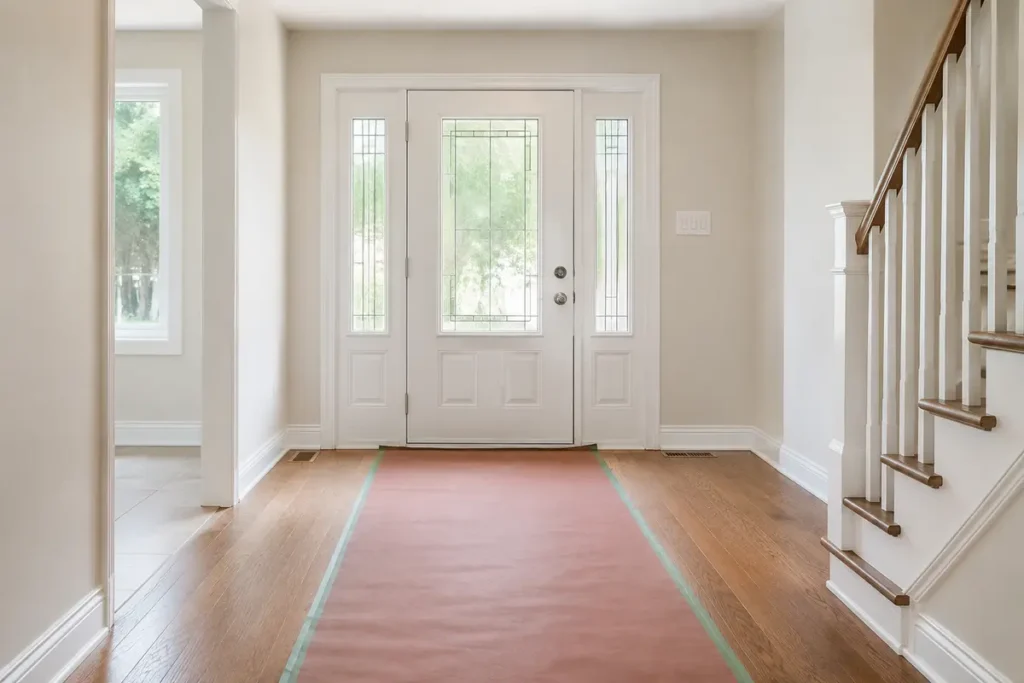
Every entrance is different, but professional entry door installers in Toronto generally follow the sequence below when replacing a complete exterior door system.
Before removal begins, the lead installer should compare the delivered door with the approved order and confirm the scope with you.
Together, you can review:
This is the right time to mention delicate flooring, recently painted walls, restricted rooms, pets, landscaping or any change that occurred after the final measurement.
The crew should verify the major specifications before making the existing entrance unusable.
The crew should place a runner, drop cloth or other suitable protection along the main pathway and around the foyer. Nearby surfaces may receive additional covering when required.
Entry-door systems are heavy and awkward to move. A clear, protected route reduces the risk of scratching floors, striking walls or damaging the new finish while the unit is carried into position.
Some dust and small debris are normal, especially when removing old caulking, trim, fasteners or deteriorated wood.
Imperial describes its general approach to site protection and workmanship on our professional window and door installation page.
For a complete replacement, installers normally remove the door slab, interior casing or stops as required, exterior trim or capping, fasteners, frame and threshold. Sidelights and transoms are also removed when they form part of the system being replaced.
Removal may involve cutting old caulking, separating trim from the wall, removing screws or nails, cutting portions of the frame, and carefully lifting the threshold from the floor or subsill.
The crew should limit unnecessary damage, but older plaster, brittle trim, previous repairs, tile close to the threshold and concealed deterioration can make removal more complicated.
The opening will also be temporarily unsecured and exposed to outdoor temperatures, so installers generally organize the work to fit and secure the new unit without an avoidable delay.
Once the old system is out, the installer can inspect areas that were previously hidden.
The opening should be checked for:
Loose material, old sealant and debris are removed so the new frame has a clean, stable base.
Minor preparation is normal. If the installer discovers substantial rot, structural movement or water damage, you should be shown the problem before it is concealed.
The bottom of the opening supports the full weight of the door system and is also one of the areas most vulnerable to water entry. It must be solid, level enough for proper preparation and compatible with the new threshold.
Depending on the door system, wall construction and manufacturer instructions, preparation may involve repairing the sub sill, adding appropriate support, applying a sill-pan or membrane detail, and using compatible sealant beneath the threshold.
The objective is to support the door continuously while directing incidental water toward the exterior rather than into the floor or wall.
The threshold should not be left rocking, unsupported or dependent on a few isolated shims. Drainage paths built into the system must remain open.
The complete prehung unit is placed into the prepared opening and checked before final fastening. The installer uses suitable shims and a level to position the frame correctly.
The frame should be:
The installer also checks the reveal—the visible spacing between the door slab and frame. An even reveal helps the door close correctly, compress the weatherstripping consistently and align with the latch and deadbolt.
A frame that is out of level, bowed or twisted can cause the door to swing by itself, rub the threshold, bind against the weatherstripping or require you to push, pull or lift it before locking.
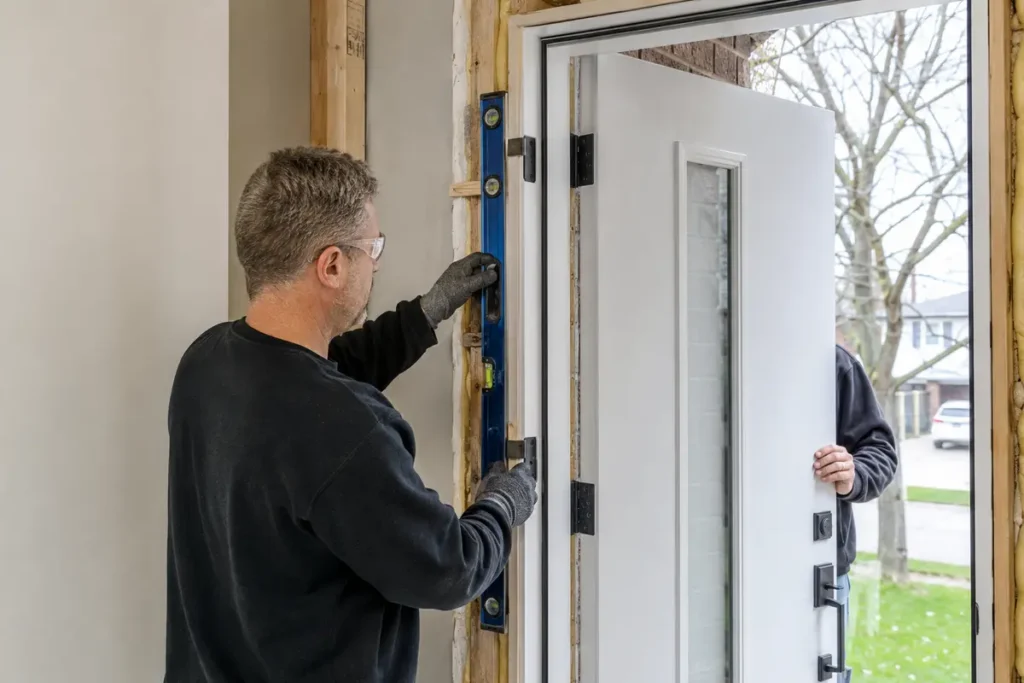
After the unit is aligned, the installer secures it using fasteners and shims appropriate for the product and surrounding construction.
Shims support the frame at important locations and prevent fasteners from pulling the jamb out of position. The hinge side, lock side, threshold and any sidelights or transoms must be stabilized according to the door system and site conditions.
Fasteners should hold the assembly firmly without bowing the jambs. The installer normally checks the door repeatedly while fastening because one overtightened screw or misplaced shim can change the reveal and affect operation.
Security also depends on how the frame and strike area connect to the structural opening. A strong slab and expensive lock cannot compensate for a loose, deteriorated or poorly anchored frame.
Our Toronto home security guide explains how the door, frame, strike plate, hinges, glass and locking hardware work together.
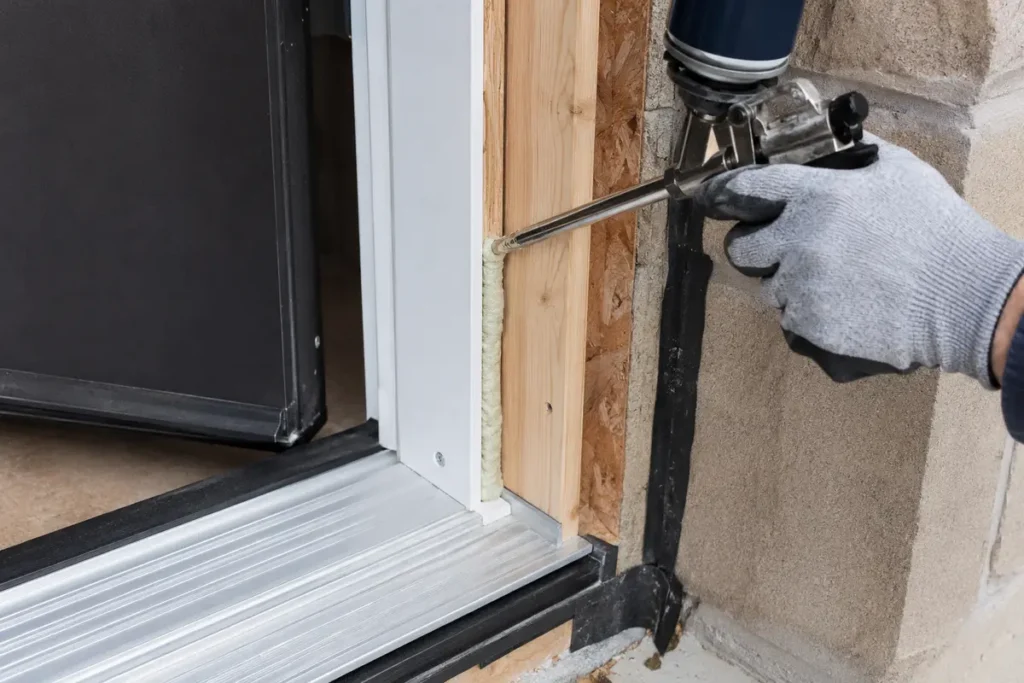
The gap between the new frame and rough opening must be insulated and air-sealed with compatible materials.
Depending on the assembly, installers may use:
The objective is to reduce uncontrolled air movement without applying enough pressure to bow the frame. High-expansion foam or excessive material can distort a door jamb and change how the slab closes.
Exterior weather sealing must also connect the new door to the surrounding brick, siding, stucco or trim while respecting the system’s drainage design. Sealant should be applied to clean, suitable surfaces in a neat and continuous detail where required.
Natural Resources Canada recommends professional installation because trained installers help ensure windows, doors and skylights perform as intended. A high-quality door cannot deliver its expected comfort or weather resistance when the frame is poorly sealed to the house.
The handle set, deadbolt, smart lock or multipoint hardware is installed or completed according to the order.
The installer checks that the latch and deadbolt enter their strikes fully without requiring the homeowner to lift, push or pull the door.
The hinges, sweep, threshold and weatherstripping are also checked. Certain thresholds include adjustable components that help create contact with the bottom sweep. The adjustment should create an effective seal without making the door difficult to operate.
For a multipoint system, all locking points should engage correctly when the handle and lock are operated as designed.
If a smart lock is included, confirm who is responsible for programming, batteries, app setup and connection to the home’s network or alarm system.
Interior casing, jamb extensions, caulking and other finishing components are installed or reinstalled according to the quotation.
On the exterior, the work may include brickmould, aluminum capping, trim, sealant or another detail suited to the wall and door system.
Before installation day, confirm whether the quote includes:
These items vary between projects. “Complete installation” does not necessarily include painting or every cosmetic repair unless the written agreement says so.
Once the work is complete, the crew should collect fasteners and debris, remove protective coverings, clean the immediate work area and take away the old door system when disposal is included.
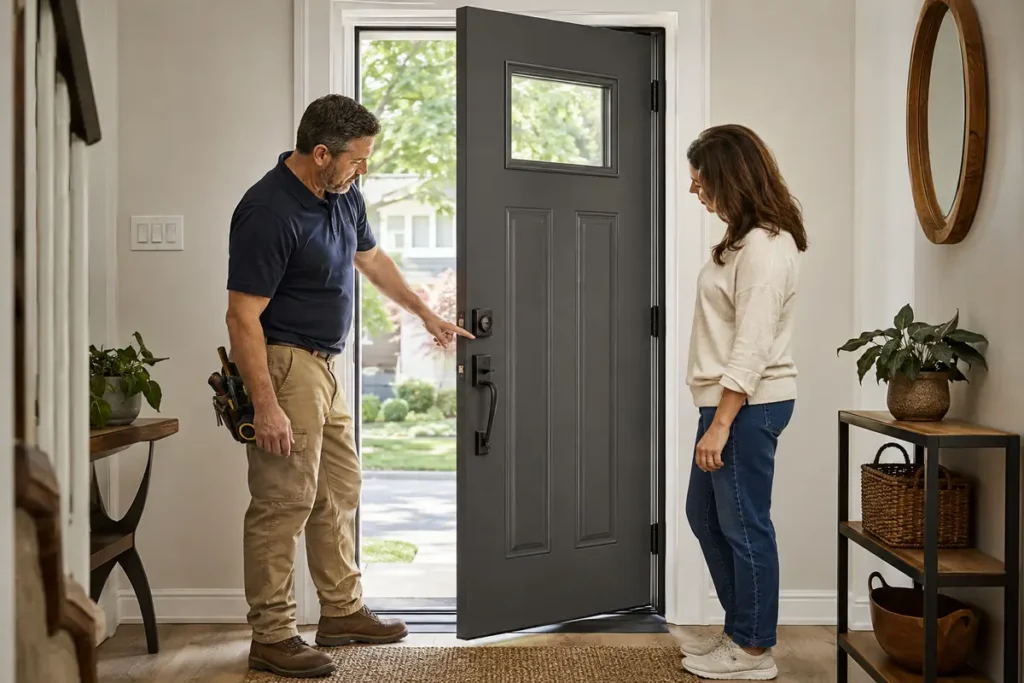
Before the installers leave, open, close and lock the door several times.
The installer should demonstrate:
This is the best time to identify:
Ask about cleaning, finish care, sealant curing time, keying, warranty registration and whom to contact if the door needs an adjustment after normal use.
Homeowners sometimes assume that entry door replacement means hanging a new slab in the old frame. That is one possible method, but it is not the same as replacing the complete entrance system.
A slab-only replacement keeps the existing frame, threshold and usually the existing weatherstripping. The new slab must be prepared so the hinge locations, lock bore, size and clearances match the old frame accurately.
Slab replacement may be practical when:
Replacing only the slab does not correct a twisted frame, damaged threshold, failed weatherstripping or poor connection between the frame and wall.
A prehung door is supplied as a coordinated system with the slab already fitted to a new frame. It commonly includes hinges, weatherstripping and a threshold, with glass, sidelights, transoms and hardware preparation manufactured according to the order.
A complete replacement is often the better choice when:
There is also an important energy-certification distinction. Natural Resources Canada explains that a door leaf installed without its original frame does not retain its ENERGY STAR certification.
If energy performance or rebate eligibility matters, compare the complete proposed system and confirm the current program requirements before ordering.
Homeowners participating in an incentive program should also review Imperial’s current Ontario window and door rebate guide before installation and keep any required product labels and documentation until the follow-up assessment is complete.
Many standard single-door replacements are completed within one working day.
A straightforward project may take approximately four to eight hours once the crew begins, but that is only a general planning range—not a guarantee for every entrance.
Installation may take longer when the project includes:
The manufacturing lead time occurs before installation day and is separate from the time required to fit the door at your home.
The company should provide a realistic installation estimate after completing the final measurement and reviewing the project scope.
Expect intermittent cutting, drilling, hammering and prying during removal and fastening.
Take fragile decorations off the nearby walls before the crew arrives. If you work from home, plan important calls away from the entrance.
Protective coverings and careful removal reduce the mess, but the work is not dust-free.
Old caulking, wood, insulation, plaster, masonry and trim may release small particles. Close doors to nearby rooms and move sensitive electronics away from the foyer.
The old frame has to be removed before the new system can be fitted. For part of the day, the entrance will be open and cannot be locked.
Use another entrance when possible, keep children and pets away, and remain reachable if you leave the immediate work area.
You may notice cold or hot outdoor air near the foyer while the opening is exposed.
Installers generally organize the work to place and secure the new unit efficiently rather than leaving the entrance open longer than necessary.
Entry doors can be replaced during different seasons, but heavy rain, unsafe wind, severe cold or product application limits may require rescheduling.
The crew must be able to protect the opening and apply sealants and other materials within suitable conditions.
Security contacts and wiring are not identical in every home.
Ask in advance which items the door installer will disconnect or reinstall and which require your alarm, electrical or smart-home provider. Test all affected equipment after the installation is finished.
Concealed deterioration is one of the main variables in exterior door replacement.
The visible trim may look acceptable while the sub sill or framing behind it has been affected by long-term leakage.
When hidden damage is discovered, the installer should:
The new system should not be installed over wet, soft or unstable material.
However, staining alone does not always mean that major structural repair is necessary. The solution depends on the condition found, and extensive moisture or structural damage may require another qualified trade.
Use the final walkthrough to inspect the visible work and operate the entrance yourself. You do not need specialist tools to identify many common problems.
Before signing off, confirm that:
Review Imperial’s window and door warranty information so you know what documentation to keep and whom to contact if service is required.
The following conditions are generally normal:
Contact the installer if you notice:
Some new doors require a minor adjustment after materials settle and the system has been used.
Report the concern rather than repeatedly forcing the hardware or making an unapproved adjustment that could affect the warranty.
Before choosing a company, ask questions that reveal exactly what product and installation work are included:
You can read homeowner experiences on Imperial’s customer reviews page.
A detailed written scope is more useful than a quotation that lists only a door model and total price.
The installation principles in this guide apply throughout the Greater Toronto Area, although wall construction, porch protection, existing frames and exterior finishes vary between homes and neighborhoods.
Imperial supplies and installs steel and fiberglass entry doors throughout Toronto and surrounding communities, including:
Homeowners planning to replace windows and an entrance together can explore Imperial’s complete windows and doors services in Toronto.
Coordinating the work through one company can simplify product selection, scheduling, exterior colours and finishing details.
Many standard single-door replacements are completed within one working day, often in approximately four to eight hours.
Double doors, sidelights, transoms, difficult access, extensive finishing or a damaged opening may require additional time.
Yes. Most homeowners remain home, but you should stay away from the active work area and keep children and pets secured.
Be available for the initial walkthrough and remain reachable if the installer discovers hidden damage or needs a decision.
That depends on the written scope.
A slab-only replacement keeps the existing frame and threshold, while a complete prehung replacement installs a coordinated new slab, frame, hinges, weatherstripping and threshold.
Ask which method is included before accepting the quote.
Yes, entry doors can be replaced during winter when weather conditions are safe and the installation products are suitable for the temperature.
The entrance will be temporarily open, but an organized crew limits exposure by preparing the work and securing the new system efficiently. Severe weather may still require rescheduling.
Tell the installation company about all alarm contacts, cameras, wired doorbells and smart locks before installation day.
Responsibility varies by system and contract. Some equipment may need to be disconnected or reinstalled by your alarm, electrical or smart-home provider.
Confirm this before ordering.
Depending on its size, condition and compatibility, an existing storm door may be removed and discarded, temporarily removed and reinstalled, or replaced.
The quotation should state whether that work is included.
The installer should show you the damaged material, explain the required repair and obtain approval for substantial additional work.
A new door should not be installed over wet, soft or unstable framing. Extensive damage may require another qualified trade.
Careful removal should minimize unnecessary damage, but brittle plaster, old trim, tile close to the threshold and previous repairs may require touch-ups.
Confirm whether new casing, drywall repairs, caulking, nail-hole filling and painting are included in the contract.
The installer should demonstrate that the door opens, closes, latches and locks before leaving.
You can normally use it immediately, but follow all instructions concerning sealant curing, painting, smart-lock setup and cleaning.
The door should open and close smoothly, maintain reasonably even spacing around the slab, compress the weatherstripping consistently, and latch and lock without needing to be lifted, pushed or pulled.
The frame and threshold should feel secure, and the perimeter should be insulated and weather-sealed according to the door system and wall conditions.
A premium door will not perform as intended when the frame is out of square, the threshold is unsupported, the lock is misaligned or the opening is poorly sealed.
Successful installation combines:
At Imperial Windows & Doors, we help Toronto and GTA homeowners compare door materials, glass, colours, configurations and hardware based on the entrance and priorities of the home.
We supply and professionally install custom steel and fiberglass entry-door systems designed for security, comfort, weather resistance and lasting curb appeal.
Request a free entry door installation estimate to discuss your entrance, preferred design and installation requirements.

Imperial Windows and Doors have long been serving our valued clients for over 10 years to be exact. We strive to deliver our clients only the finest solutions guaranteed to suit their needs, style, preferences and budget.

Imperial Windows & Doors provides professionally installed replacement windows, entry doors and patio doors for homeowners across Toronto and the GTA.