Get inspired for your next home improvement projects by browsing through our blog posts, which are full of great tips, valuable advice, and industry insights.

Blog

Last reviewed: September 3, 2026
Water on a windowsill after a Toronto rainstorm can look like a straightforward window failure. Sometimes it is. In other cases, the water has travelled from the roof, masonry, siding or wall above and only becomes visible when it reaches the window opening. Moisture on the glass may also be indoor condensation rather than rain entering from outside.
That distinction matters. Replacing a window will not correct a leaking roof, overflowing eavestrough, failed wall flashing or poor drainage around a basement window. At the same time, repeatedly caulking the visible edge of a damaged window can hide the symptom while moisture continues to affect the opening.
The correct response begins with the source. This guide explains why windows leak during rain, what different moisture patterns can mean, which checks homeowners can complete safely and when repair, glass replacement or complete window replacement in Toronto may be appropriate.
Water can appear around a window because of a problem with the window itself, the way it was installed or another part of the building envelope.
Common possibilities include:
The visible location of the water is a clue, but it is not proof of the entry point. Water can move behind finishes before appearing on a sill, at a trim joint or on the drywall below.
If water is entering during a storm, focus first on limiting damage and documenting what is happening.
If water is near an electrical outlet, fixture or energized equipment, keep away from the affected area and contact an appropriate qualified professional. Extensive or contaminated water entry may also require an emergency restoration specialist.
Temporary containment protects the room; it does not diagnose or repair the leak.
Rain leaks and condensation can both leave water on a sill, but their timing and location are different.
A likely exterior leak usually appears during rain, wind-driven rain or snowmelt. You may see water at one corner of the frame, below the head of the window, along the trim, on the wall or on the sill. Staining may become larger after repeated storms.
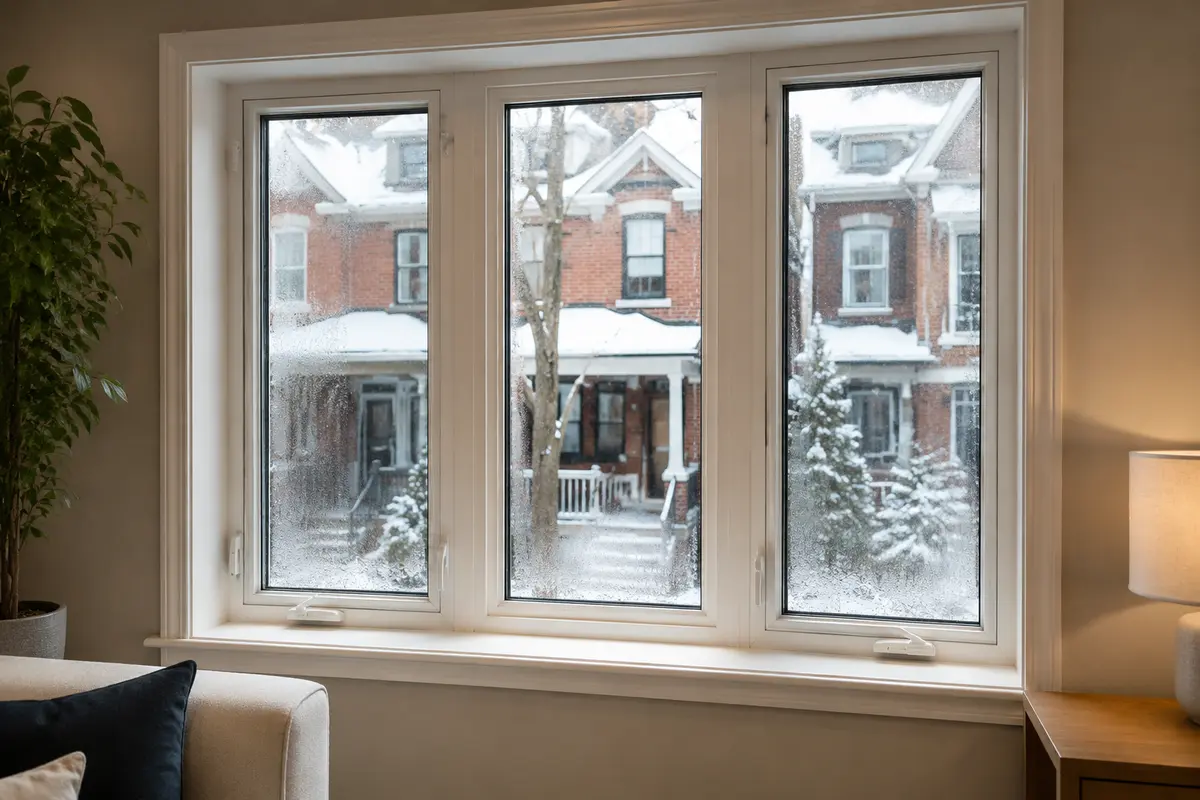
Interior condensation forms when moist indoor air reaches a cold surface. It often appears broadly along the glass or lower edge during cold weather and may occur even when it has not rained. Indoor humidity, airflow, window coverings and glass temperature can all influence it.
Moisture trapped inside a factory-sealed insulating glass unit normally indicates a failed glass seal. It can make the glass cloudy, but it is not the same as rain travelling through the wall or around the window frame.
Dew on the outdoor surface can occur when the exterior glass becomes colder than the outdoor dew point. It is normally temporary and does not mean water is entering the house.
Our complete guide to window condensation in Toronto explains these moisture locations in greater detail.
Where the moisture first becomes visible can help narrow the investigation. These patterns are useful clues, but they do not prove where the water originally entered.
Water appearing above the window may point to the head flashing, masonry, siding, roof edge or another opening higher on the wall. The area above the window should be inspected and the water path traced before the window itself is replaced.
Moisture concentrated at one lower corner may be connected to a perimeter joint, sash seal, frame drainage path or installation detail. Record the wind direction and note exactly where the water first appears so the window and surrounding perimeter can be assessed.
Some window systems are designed to collect small amounts of incidental water and drain it outside. Water that remains or overflows may indicate debris or an altered drainage path. Follow the manufacturer’s maintenance instructions and never seal drainage openings.
Moisture spread broadly across the interior surface of the glass is more likely to be condensation than rainwater. Review indoor humidity, airflow, window coverings and glass temperature before assuming the window is leaking from outside.
Fog or moisture that cannot be wiped from either glass surface usually indicates a failed insulating glass unit. Ask whether the sealed glass can be replaced while retaining a sound sash and frame.
Staining, swelling or wet finishes below the opening may indicate repeated water entry through the window perimeter or wall cavity. Treat this as a building-envelope concern and arrange an investigation promptly.
The source may involve the window well, grading, foundation or exterior drainage rather than the window alone. Keep surface water away from the opening and have the complete window-and-drainage condition assessed.
A bay or bow window has a roof, platform and several connected joints. The complete projection should be inspected because water may enter through one of these components rather than through the front glass or frame.

Exterior sealant helps close specified joints between the window system, trim and surrounding materials. Over time it can split, pull away, harden or lose adhesion.
A failed joint can be repairable when the window, flashing, drainage and surrounding materials remain sound. Proper work normally involves removing incompatible or deteriorated material, preparing a clean and dry joint, choosing a sealant suitable for the substrates and conditions, and applying it in the correct joint configuration.
Simply adding a thick new bead over failed caulking can trap moisture, bridge intended drainage gaps or fail again because the underlying surface was not prepared.
Weatherstripping seals the moving parts of an operable window. A torn, compressed or displaced seal may allow air and, under certain exposure conditions, water to pass the closed sash.
The sash may also be out of adjustment, obstructed by debris or affected by worn hardware. Check whether the window closes completely and locks evenly. Do not force a crank, lock or sash that is binding.
Natural Resources Canada distinguishes between caulking stationary joints and weatherstripping operable joints. Using one material in place of the other does not address how the window is designed to move and seal.
Many window systems are designed to collect small amounts of incidental water and direct it back outside. Tracks, drainage channels and outlet openings must remain consistent with the manufacturer’s design.
Paint, sealant, construction debris, insects or dirt can interfere with drainage. However, not every visible slot or gap should be probed, enlarged or altered. Use the product manufacturer’s care instructions or have the unit serviced. Never caulk over a drainage opening to make the exterior look more “sealed.”
A high-quality window can still leak if the opening was measured, prepared, flashed, insulated or sealed incorrectly. Potential issues include:
Research from the National Research Council of Canada emphasizes redundancy in water-penetration control at window installations, including drainage beneath the sill. In practical terms, long-term protection should not depend on one exposed bead of caulking alone.
The point where water becomes visible is not always where it entered. Rain can pass through a crack or failed joint above the window, move behind exterior finishes and emerge at the opening.
On a brick-veneer home, the masonry is part of a wall system that manages water through drainage and flashing details. On sided or stucco-clad walls, joints, penetrations and transitions above the window also matter. A replacement window contractor may need to coordinate with a mason, roofer, siding contractor or building-envelope specialist when the defect extends beyond the opening.
Older wood frames can soften, split or rot after prolonged exposure. Vinyl or aluminum components can crack, separate or become distorted. Deteriorated material may no longer support a durable seal or correctly fastened replacement unit.
Covering unsound material with aluminum capping does not restore its strength or remove the moisture source. The damaged area has to be exposed far enough to determine what can remain and what must be repaired or replaced.
Bay and bow windows project beyond the main wall and therefore contain more junctions than a simple flat window. Water may enter at the small roof, upper flashing, mullion joints, underside or connection to the wall.
An assessment should examine the entire assembly. Replacing only the front windows may not correct a leak originating in the projection roof or platform.
Basement windows are affected by conditions at ground level. A window well that fills with water, soil sloping toward the foundation, a short downspout discharge or cracks around the opening can direct water toward the window.
The City of Toronto advises homeowners to address leaks at basement windows and wells and to keep melting snow away from the foundation in its basement-flooding prevention guidance. A new basement window is only one part of the solution when exterior drainage is the cause.
A leak that appears only in certain storms can still indicate a real defect. Wind changes the direction and pressure of rain, pushing water against joints that receive little exposure during a light vertical shower.
The pattern can depend on:
Record the conditions each time. “It leaks only during a northeast wind” is much more useful diagnostic information than “the window leaks sometimes.”

You can collect useful information without dismantling the opening.
Do not remove masonry, siding, capping or flashing simply to look behind it. Do not lean out of an upper-storey window or climb a wet ladder. A controlled water test should be staged carefully so one area is tested at a time; spraying the entire wall can produce confusing results or force water into places it would not normally reach.
Some gaps are drainage or movement details. Sealing them can make the problem worse. Diagnose the joint before filling it.
New sealant depends on correct surface preparation, compatible materials, proper joint dimensions and suitable application conditions. A cosmetic overlay is not automatically a durable repair.
Roofing, eavestroughs, masonry, cladding and wall penetrations can release water at a window opening. Replacing the window without correcting the upstream path may leave the leak unchanged.
Water on the room-side glass during cold weather may be an indoor-humidity issue. Moisture between panes usually indicates glass-seal failure. Neither condition is diagnosed by exterior caulking alone.
Paint and new trim can hide evidence while the underlying material remains wet. The source should be corrected and affected materials assessed before cosmetic finishing.
Installing a new window inside a wet, rotten or unstable perimeter frame conceals the problem. A retained frame must be dry, sound and suitable for the new unit.
Yes, some leaking-window problems can be repaired. The appropriate scope depends on the cause and condition of the opening.
Imperial Windows & Doors specializes in replacement projects. If the opening only needs a minor service repair, ask the original installer, product manufacturer or a qualified window-repair provider about available parts and procedures.
An insulated glass unit has failed but the window frame, sash, hardware and installation remain sound. Replacing the sealed glass can restore clarity and insulating function without removing the complete frame.
Glass-only work will not correct a leaking perimeter, damaged frame, missing flashing or water travelling through the wall.
Age alone should not make the decision. Condition, repairability, product performance, damage and the source of water matter more than an arbitrary replacement anniversary.
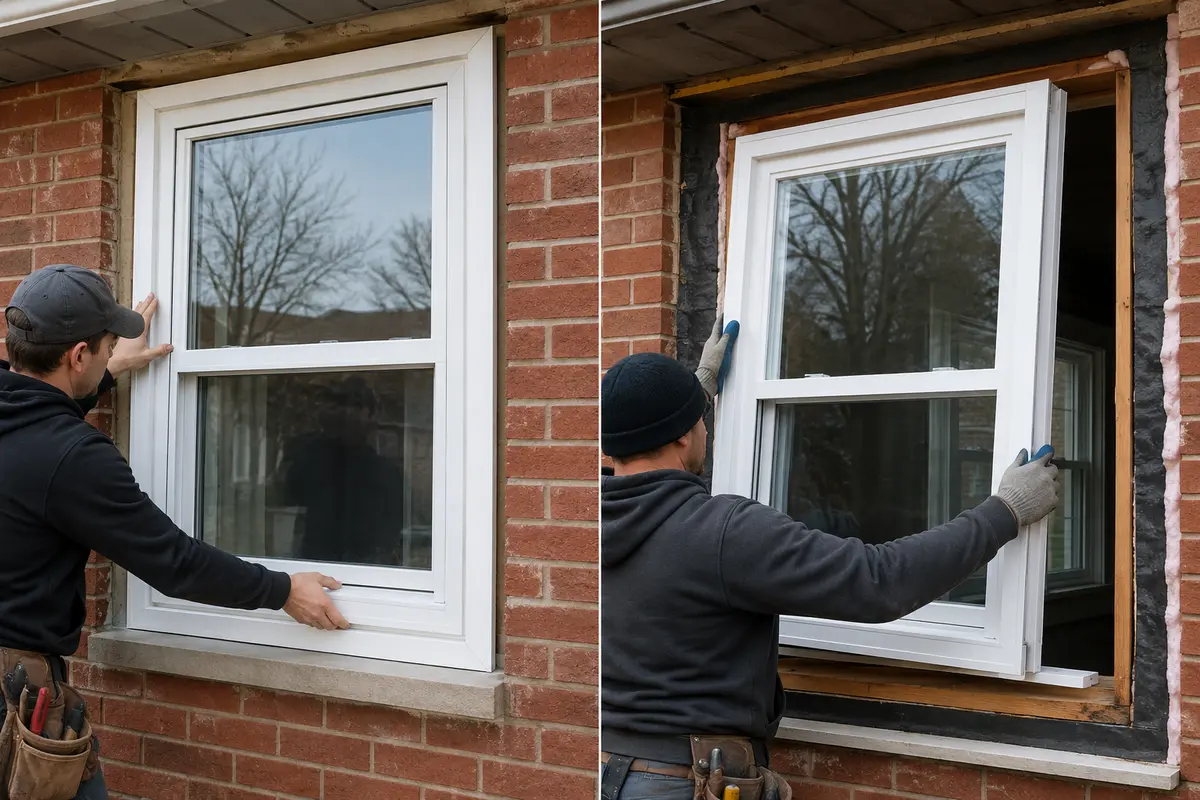
Retrofit installation places a complete new window within a suitable existing perimeter frame. Full-frame, often called brick-to-brick replacement on masonry homes, removes the old window and perimeter frame to expose more of the opening.
A retrofit can be reasonable when the retained frame is confirmed to be dry, structurally sound, correctly integrated and free of unresolved leakage. It should not be used to hide decay or avoid investigating a wet opening.
Full-frame replacement can provide better access to:
Full-frame removal is not a guarantee that every leak will disappear. If rain is entering through the roof, brickwork, siding, stucco or another wall component, that source must also be repaired.
Read our detailed comparison of retrofit and full-frame window replacement before approving a quotation that does not clearly state what will remain and what will be removed.

A recently installed window should be reported promptly to the company that supplied and installed it.
Before contacting the installer:
The cause may involve product adjustment, an installation detail, a manufacturing issue or an unrelated water path in the wall. A clear record helps the installer reproduce and investigate the condition.
Review Imperial’s window and door warranty information to understand why product coverage and installation workmanship should both be documented.
A useful assessment should go beyond looking at the wet spot after it has dried.
The inspector may consider:
Complex or intermittent leaks may require a controlled water test. Testing should begin low and progress in stages so the source is isolated rather than flooding the complete wall at once.
A detailed written scope is more valuable than a vague promise to “seal the window.”
Water can affect materials that are not visible until trim or the old frame is removed. The quotation should explain how concealed conditions will be handled.
Possible findings include deteriorated wood, wet insulation, stained sheathing, corroded fasteners, damaged drywall or an opening that was previously altered. The correct response depends on the extent and source of the problem.
Before work begins, confirm:
Do not allow damaged material to be covered merely to keep the original schedule.
There is no reliable price based only on the visible amount of water. A small stain can come from a simple failed joint or a concealed wall problem, while a dramatic puddle can sometimes result from an obstructed drainage path.
Cost can depend on:
Compare itemized scopes rather than selecting the lowest number without knowing what it includes. Our Toronto window replacement cost guide explains the main factors that affect installed pricing.
Once the water source and required installation method are understood, compare the complete window system.
Casement and awning windows use compression seals when closed. Slider and hung windows move within tracks and use different sealing and drainage strategies. The right style depends on the opening, ventilation, cleaning, exterior clearance, emergency-egress requirements where applicable and homeowner preference.
Double- and triple-pane glass can both be appropriate. Compare whole-window U-factor, Energy Rating, Low-E coatings, solar heat gain, spacer, gas fill and the performance of the exact product—not pane count alone.
Our double-pane versus triple-pane window guide explains the tradeoffs for Toronto homes.
The installation scope must address the condition found at the opening. A premium window installed within a damaged retained frame is not a complete solution.
Confirm jambs, casing, exterior trim or capping, sealant, insulation, disposal and painting responsibilities. Ask how the new window will connect to the water-management details of the wall.
Review coverage for the window, glass, hardware and installation labour. Keep the contract, final specifications and photographs of the completed work.
Learn what happens from consultation to final inspection in our window replacement process and professional installation guides.
No window is maintenance-free in every respect. A periodic visual check can identify small changes before the next severe storm.
If a project is not urgent, our guide to the best time to replace windows in Toronto can help with seasonal planning. Active water entry should be assessed promptly instead of waiting for an ideal month.
The diagnostic principles are the same across the GTA, but the wall assembly, window exposure and age of each home can change the likely cause.
Imperial Windows & Doors provides residential window replacement and installation throughout Toronto and surrounding communities, including:
Older brick homes, newer subdivisions, custom properties, townhouses and condominiums can require different investigation and installation scopes. In a condominium, confirm whether the window and exterior wall are the owner’s or corporation’s responsibility before authorizing work.
A leaking window is a symptom. The lasting solution depends on whether water is entering through the sash, frame, installation perimeter, surrounding wall or another component above or below the opening.
Imperial Windows & Doors helps homeowners in Toronto and the GTA assess replacement-window projects, compare retrofit and full-frame installation, select suitable products and document the work included in the quotation. If the source is outside the window system, it should be identified so the appropriate repair can be coordinated instead of hidden behind a new unit.
Contact Imperial Windows & Doors to request a free estimate for a window that may require replacement.
Wind-driven or prolonged rain can place water against joints that receive little exposure during a light shower. The source may be the sash, drainage path, perimeter seal, flashing or wall above. Record the wind direction and where water first appears so the condition can be investigated accurately.
Caulking can correct certain failed stationary joints when the window, flashing and surrounding materials are sound. It will not repair rotten framing, blocked drainage, a poorly integrated installation or water entering from the roof or wall. Do not cover drainage openings or apply new sealant over wet, dirty or failing material.
A rain leak normally appears during rain, wind-driven rain or snowmelt and may wet the frame, trim or wall. Interior condensation commonly forms as droplets across cold room-side glass. Fog trapped between panes indicates a failed insulating-glass seal rather than rain entering around the frame.
Water at the head of a window may come from the upper perimeter joint, head flashing, masonry, siding, stucco, roof edge or another penetration above. Because water can travel behind finishes, the visible drip is not necessarily the original entry point.
Yes. Water can enter at roofing, flashing, eaves or a wall penetration and follow framing until it reaches a window opening. Inspect the area above the window before assuming that replacing the window will solve the problem.
No. Openings that are part of the window’s drainage design should not be sealed. Follow the manufacturer’s instructions for identifying and maintaining drainage paths because window systems differ.
Persistent fog or moisture between panes normally means the seal of the insulated glass unit has failed. The sealed glass may be replaceable if the sash, frame, hardware and installation are otherwise in good condition. It is different from rainwater entering around the window.
No. Minor sealant, weatherstripping, hardware or drainage issues may be serviceable. Full-frame replacement becomes more appropriate when the retained frame is damaged, the installation must be exposed or the opening cannot support a durable retrofit. Water originating elsewhere in the wall still requires separate correction.
Only when the window or its installation is the actual source and the replacement scope corrects that source. A new window will not automatically fix a roof, masonry, siding, stucco, grading or foundation problem.
Possible causes include sash adjustment, a damaged component, an installation or drainage detail, exterior sealant failure or water travelling from another part of the wall. Document the conditions and contact the original installer before altering the window or perimeter.
Contain the water, keep valuables away and check whether the window well, grading, downspout discharge or foundation is directing water toward the opening. The complete drainage condition should be assessed; replacing the window alone may not solve exterior water accumulation.
Yes. A single opening can be replaced when the cause and scope are clear. Before ordering, inspect nearby openings on the same elevation for similar sealant, flashing or wall conditions so a broader issue is not overlooked.
Yes, replacement may be possible on a suitable winter day when access is safe and installation materials are approved for the conditions. Active leakage should be assessed promptly, while the installation date should account for temperature, snow, ice and the ability to complete exterior weather protection correctly.
Promptly. Repeated wetting can affect trim, drywall, insulation and concealed materials. Contain active water, document the pattern and arrange an assessment rather than waiting for the stain to become larger.

Imperial Windows and Doors have long been serving our valued clients for over 10 years to be exact. We strive to deliver our clients only the finest solutions guaranteed to suit their needs, style, preferences and budget.

For quality windows and door installation services in Toronto and the GTA area, Imperial Windows and Doors is the number one name that you can trust!