Get inspired for your next home improvement projects by browsing through our blog posts, which are full of great tips, valuable advice, and industry insights.

Blog
Last reviewed: August 13, 2026
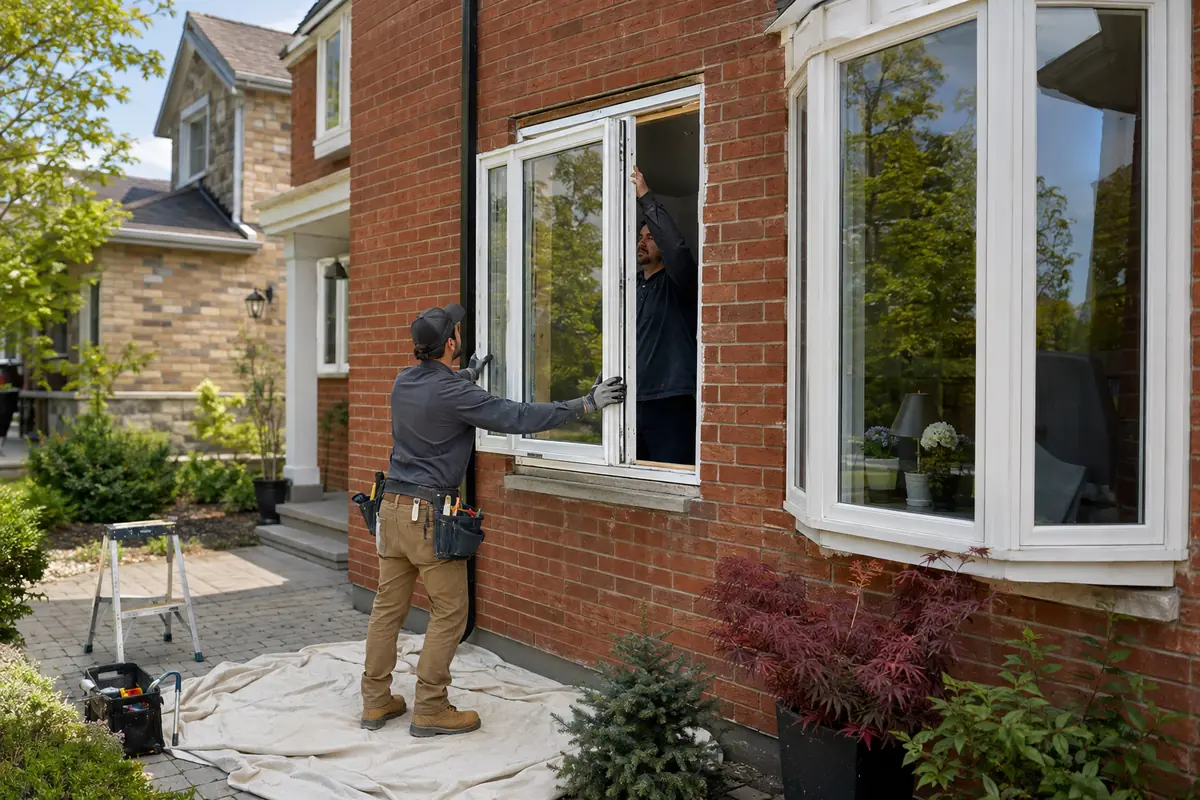
Replacing your windows is a major home improvement, but the actual installation should not feel mysterious. Once your custom windows are ready, an experienced crew follows a careful sequence: protect the work areas, remove the old units, inspect the openings, set and secure the new windows, insulate and seal the perimeter, complete the interior and exterior finishing, and test everything before cleanup.
This guide explains the complete window replacement process in Toronto, including what happens before installation day, how to prepare your home, how long the work may take, what installers look for after the old windows come out, and what you should inspect before the crew leaves.
If you are still comparing products and window styles, start with Imperial's overview of replacement windows in Toronto. If you are ready for installation, the steps below will help you know exactly what to expect.
Most residential window replacement projects move through five broad stages:
The exact details depend on whether the project uses a retrofit installation or a full-frame brick-to-brick replacement. Window size, location, accessibility and the condition of the existing opening can also affect the schedule.
A good installation begins well before the crew arrives. Careful product selection and accurate measurements reduce the risk of delays, incorrect configurations and avoidable changes on installation day.
During the consultation, the estimator should inspect the existing windows and ask what you want to improve. Common goals include reducing drafts, improving operation, increasing ventilation, lowering outside noise, changing the appearance of the home, or replacing deteriorated frames.
You will normally review:
If pricing is still part of your decision, our window replacement cost guide for Toronto explains the main factors that affect the final quote.
For help comparing glass packages, see our guide to double-pane versus triple-pane windows.
Replacement windows are normally made to fit the specific openings in your home. Before manufacturing begins, the installer or measurement technician should confirm the dimensions and important job details rather than relying only on an early estimate.
The final measurement may confirm:
This is also the time to identify unusually large units, upper-floor windows, bay or bow windows, alarm contacts, security bars, shutters, motorized window coverings or other features that may affect installation.
Once the measurements and selections are approved, the windows are manufactured. Lead times vary depending on the season, manufacturer, number of units, custom colours, specialty glass and product complexity.
When the order is complete and has been checked, the company schedules the installation.
Before the date is confirmed, ask:
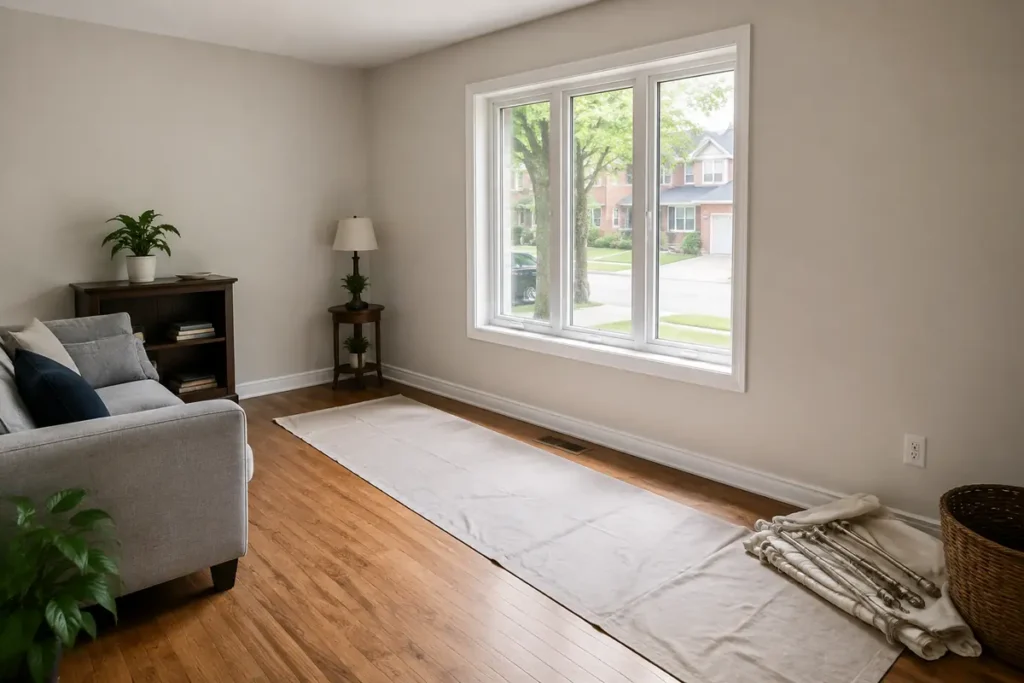
Preparing the work areas makes the installation safer and more efficient. It also helps protect furniture, decorations and window coverings from dust or accidental damage.
Before the installers arrive:
You do not need to cover the entire house yourself. A professional crew should protect the working path and the area around each window, but homeowner preparation gives the installers unobstructed access and helps the day move smoothly.
Although every home is different, a professional window installation in Toronto generally follows the sequence below.
The lead installer should confirm the scope of work before removal starts. Together, you can review which windows are being replaced, the planned order of work, access concerns, special finishes, alarm contacts and any areas that require extra care.
This is the right time to point out delicate flooring, recently painted walls, restricted rooms, pets, landscaping or any change since the final measurement.
The crew should also compare the delivered units with the order before removing your existing windows.
Installers bring tools and materials through the home and work from both sides of many openings. Drop cloths, runners or other protective coverings should be placed in the active rooms and along the main pathway. Nearby furniture may receive additional covering when needed.
Some dust and small debris are normal during removal, especially in older homes, but the work area should remain controlled.
Imperial explains its approach to careful site preparation on our professional window and door installation page.
The removal method depends on the installation type.
For a retrofit project, the crew generally removes the operating portions and prepares the sound existing frame to receive the new unit. For a full-frame replacement, the old window, frame and related materials are removed back to the rough opening.
Installers normally work on one opening or a limited number of openings at a time. This helps control exposure to outdoor temperatures and allows each opening to be made secure before the crew moves on.
Removal may involve cutting old caulking, taking off stops or trim, removing fasteners and carefully separating the frame from the surrounding materials.
The crew should avoid unnecessary damage, but brittle trim, old plaster, deteriorated wood or previous repairs can make removal more complicated.
Once the old window is out, the installer can see areas that were previously concealed.
The opening should be checked for:
Old sealant, loose material and debris are removed so the new unit has a clean, stable base.
Minor preparation is a normal part of window replacement. If substantial repair is required, the installer should show you the issue, explain the recommended work and discuss any effect on cost or timing before proceeding.
The new window is placed in the opening and checked before final fastening. The installer verifies the fit and uses appropriate shims to position the frame so it is level, plumb and square.
This step matters because a frame that is twisted, bowed or out of square may cause:
Gaps around the perimeter must also leave enough room for proper insulation and movement without making the opening excessively loose.
After the frame is aligned, the installer fastens it according to the window system and the conditions of the opening. Fasteners and shims should hold the frame securely without pulling it out of alignment.
The installer should check the operation during this stage rather than waiting until all finishing is complete.
Casement, awning, slider and hung windows each have different hardware, but all operating sections should move smoothly and meet the frame evenly.
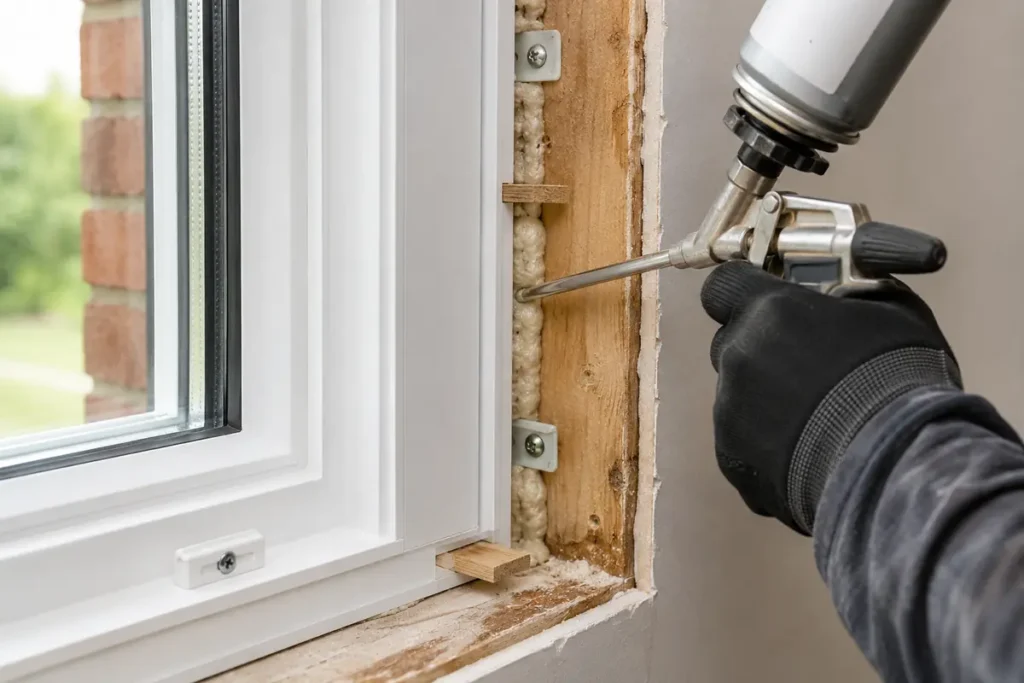
The space between the new frame and the surrounding opening must be insulated and air-sealed with materials suitable for windows and doors.
The objective is to reduce uncontrolled air movement while avoiding excessive pressure that could distort the frame.
Depending on the installation system and opening, the crew may use:
The work should create continuity between the window and the wall assembly rather than leaving visible gaps.
Natural Resources Canada notes that even a high-performing window can develop drafts, condensation or water problems when installation is poor. Product performance and installation quality must work together.
The exterior is finished to help direct water away from the opening and protect vulnerable materials.
The exact detail depends on the house, window system and installation method. It may include:
Exterior caulking should look neat and continuous, but appearance is not the only consideration. The assembly must be compatible with the surrounding brick, siding, stucco or trim and must not block intentional drainage paths.
Interior stops, casing, jamb extensions or other finishing components are installed or reinstalled according to the written scope.
Retrofit projects may preserve more of the existing interior finish. Brick-to-brick replacements generally involve more extensive trim work because the original frame has been removed.
Before installation, confirm whether the following items are included:
These items vary by quote, and “interior finishing” does not mean exactly the same thing in every contract.
Once the window is complete, the crew should:
The glass and frames should be left reasonably clean, although a final light household cleaning after construction can sometimes be helpful.
Keep product labels, order information and warranty documents until you have confirmed what must be retained for future service.
Before the crew leaves, every operating window should be opened, closed and locked.
The installer should demonstrate:
This is also the time to identify a stiff lock, rubbing sash, damaged screen, glass defect or finishing concern.

The two common replacement methods create different installation-day experiences.
Neither method is automatically right for every home. The choice depends on the condition of the existing frame, the construction of the opening, the desired finish and the project budget.
With a retrofit installation, the sound existing frame remains in place and the replacement unit is fitted within it. This method generally causes less disturbance to interior and exterior finishes and can often be completed more quickly.
A retrofit installation may be appropriate when:
The lower amount of removal does not eliminate the need for precision. The retained frame must be prepared correctly, and the new unit still has to be square, secure, insulated and weather-sealed.
A brick-to-brick installation removes the complete existing window and frame back to the rough opening.
This exposes more of the surrounding construction and allows the installer to inspect and address concealed conditions, add a complete new window system, and replace the interior and exterior finishing as required.
Full-frame replacement may be the better option when:
Because more material is removed and rebuilt, brick-to-brick installation normally takes longer and may create more dust and finishing work.
The installation method should be clearly described in the quotation so you understand exactly what will be removed and replaced.
A standard replacement opening may take approximately 30 minutes to 1.5 hours, but that is only a broad planning range.
Full-frame installations, large picture windows, upper-floor units, specialty shapes, bay or bow windows, difficult access and damaged openings can take considerably longer.
Many multi-window residential projects can be completed in one day, while larger or more complex projects may require a second day or a phased schedule.
The most reliable estimate comes after the company has measured the openings and confirmed the installation method.
The schedule may be affected by:
Speed should not come at the expense of alignment, fastening, insulation, sealing or testing. An efficient crew can still pause when an opening needs additional preparation.
Expect periods of hammering, drilling, cutting and prying.
Removal can also create vibration in the wall, which is why nearby pictures and fragile decorations should be moved in advance. The noise is usually intermittent as the crew progresses from one opening to the next.
Floor protection and controlled removal reduce mess, but window replacement is not dust-free.
Older caulking, trim, insulation, paint and masonry can release small particles. Close doors to rooms that are not involved, move sensitive electronics away from the work area and tell the installer about anyone in the home with specific dust sensitivities.
An opening is temporarily exposed during removal and fitting.
Professional installers usually limit this exposure by working on one opening or a small group at a time and completing the new installation before moving on.
In winter or very hot weather, you may notice a temporary temperature change near the active room.
Window replacement can be completed during different seasons, but heavy rain, unsafe wind, extreme conditions or a sealant’s application limits can require a schedule change.
A responsible installer should consider worker safety, protection of the opening and the requirements of the materials rather than forcing the job to continue in unsuitable conditions.
The crew will need interior and exterior access to each opening.
You do not have to watch every step, but someone should be available at the beginning for the walkthrough and reachable if a concealed problem or decision arises.
Plan private calls, naps and pet routines around the rooms being serviced.
Concealed deterioration is one of the main variables in window replacement.
A window may look acceptable from the room while the wood behind the trim shows moisture damage, old leakage or inadequate insulation after removal.
When a hidden issue is found, the installer should:
The new window should not simply conceal wet, soft or unstable material.
At the same time, not every stain means major structural damage. The appropriate repair depends on what is actually found, and more extensive water or structural problems may require another qualified trade.
Use the final walkthrough to check the parts of the project you can reasonably observe.
You do not need specialist tools. Careful operation and a visual review can reveal issues that are easier to correct while the crew is still on site.
Before signing off, confirm that:
Review Imperial’s window and door warranty information before the project so you know whom to contact and what documentation to keep.
The following conditions are generally normal:
Contact the installer promptly if you notice:
Some sealants need curing time, so ask when the exterior can be washed, painted or touched.
If something does not look or operate correctly, document it with photographs and contact the installer rather than trying to disassemble or adjust the window yourself.
Before choosing a contractor, ask questions that reveal both product quality and installation practices:
You can read verified homeowner feedback on Imperial’s customer reviews page.
A clear written scope and realistic answers are more useful than a quote that provides only a total price.
The installation principles in this guide apply throughout the Greater Toronto Area, although home construction, access and exterior finishes vary by neighbourhood.
Imperial provides residential window replacement and installation in Toronto and surrounding communities, including:
For homes affected by traffic, aircraft or neighbourhood noise, installation details are only one part of the solution.
Our guide to soundproof windows in Toronto explains how glass, frame design, air sealing and the existing wall assembly work together.
A standard replacement window may take approximately 30 minutes to 1.5 hours, depending on the installation method, size, access and condition of the opening.
Full-frame, oversized, bay, bow or damaged openings can take longer.
Yes. Most homeowners remain home, but you should stay away from active work areas and keep children and pets secured.
Be available at the start for the job walkthrough and remain reachable if the installer finds a concealed issue or needs a decision.
Usually, yes.
Remove blinds, curtains, shades and any brackets that prevent access to the window frame unless the installation company confirms otherwise.
Clearing the opening protects your window coverings and gives the crew room to work.
Where the room allows, provide approximately one metre, or three to four feet, of clear space in front of each window.
You should also create an unobstructed path between the entrance and the work area.
Window replacement can be performed during winter when conditions are safe and the installation materials are suitable for the temperature.
Crews commonly limit heat loss by working on one opening or a small number of openings at a time. Severe weather may still require rescheduling.
Professional installation commonly includes removal of the old units and job-related debris, but you should confirm disposal in the written quote.
Tell the company before installation if you want to keep any old hardware or other components.
Careful installation should minimize unnecessary damage, but brittle trim, old plaster, previous repairs and full-frame removal can require touch-ups.
Confirm in writing whether new casing, nail-hole filling, caulking and painting are included.
The installer should show you the affected material, explain the repair and obtain approval for any substantial additional work.
A new window should not be installed over wet, soft or unstable framing. Extensive damage may require another qualified trade.
The installer should demonstrate that the windows open, close and lock before leaving.
You can normally operate them immediately, but follow any instructions about curing exterior sealant, removing labels, cleaning glass or reinstalling window coverings.
The window should sit square in the opening, operate smoothly, lock without excessive force, and have continuous insulation and weather sealing appropriate to the installation.
Visible gaps, a bowed frame, binding hardware or water entry should be reported promptly.
The best window cannot perform as intended if the opening is poorly prepared or the frame is installed out of square.
A successful project combines:
At Imperial Windows & Doors, we help homeowners compare window styles, glass packages and installation options based on the conditions of the home.
If you are researching windows and doors in Toronto or planning a window-only project anywhere in the GTA, we can explain the scope clearly before you make a decision.
Request a free window replacement estimate to discuss your home, your priorities and the installation method that fits your project.

Imperial Windows and Doors have long been serving our valued clients for over 10 years to be exact. We strive to deliver our clients only the finest solutions guaranteed to suit their needs, style, preferences and budget.

Imperial Windows & Doors provides professionally installed replacement windows, entry doors and patio doors for homeowners across Toronto and the GTA.